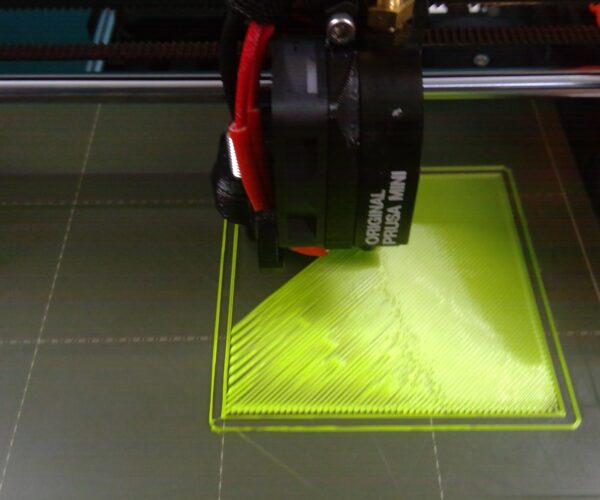
...It really looks to me that the physical bed itself is off level on one side..
Why don't you check if that's the case? -it's something only you can do (read this , for example).
[Mini+] [MK3S+BEAR]
BED LEVEL
A good ruler or straight edge can help determine a rough idea if a bed is flat.
--------------------
Chuck H
3D Printer Review Blog
check physical heatbed level
I'll give a shot tonight and see if I can make some of those adjustments.
RE: Malabor
This not an x axis test failure 😉 but mash bed leveling issue.
It can be caused by the non perpendicular x and z axes.
Try the following: https://help.prusa3d.com/en/article/xz-axis-skew-correction-mini-mini_158518
even an old man can learn new things 🙂
Standard I3 mk3s, MMU2S, Prusa Enclosure, Fusion 360, PrusaSlicer, Windows 10
PRUSA MINI+ Prusalink + Prusa Connect
'Mesh Bed' Leveling
whoops...well, I'm still SUPER new to 3d printing, so please forgive my wrong terminology. 😀 I did get a chance this morning to drop a straight edge on the mesh bed and there is a little daylight in sections. When I get home tonight, I'll follow the above linked tutorial and see if I can get it dialed in. I'll keep you all posted.
Thanks!
Update on the leveling
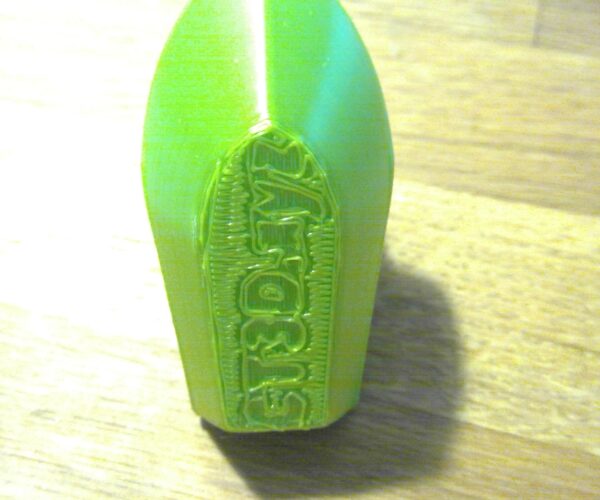
See pics below. After doing some both minor and major adjustments I got my mini to pass it's axis and leveling tests. Now I moved on to printing the calibration sheet and a cali-cat. As you can see, there's sections that have good adherence and there's section that don't. The right side of the bed sticks great and provides a good solid sheet. The center of the bed gets looser and doesn't stick together as well.
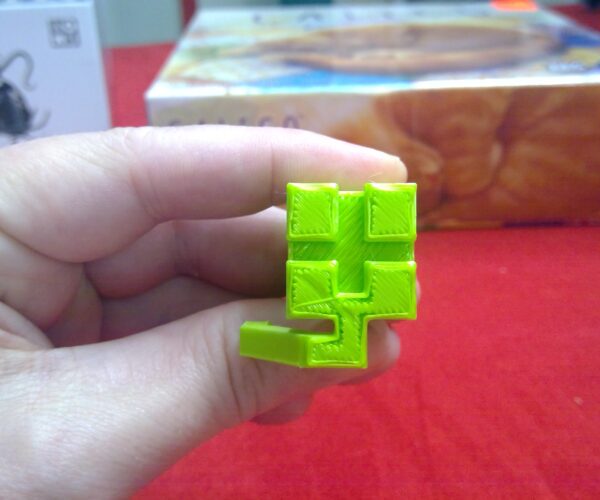
the Cali cat printed fine, but you can see that the first layer isn't perfect. The rest of the kitty was solid and printed with no other issues.
Suggestions how I can get a more consistent printing? I'm nervous to try and print something bigger for fear that some sections will be much better than others.
Thank you!
First layer
Do you have correctly set the 1-st Layer calibration?
even an old man can learn new things 🙂
Standard I3 mk3s, MMU2S, Prusa Enclosure, Fusion 360, PrusaSlicer, Windows 10
PRUSA MINI+ Prusalink + Prusa Connect
chat
You are way too high on oen side. I do not think your bed it level. I would contact support.
See pics below. After doing some both minor and major adjustments I got my mini to pass it's axis and leveling tests. Now I moved on to printing the calibration sheet and a cali-cat. As you can see, there's sections that have good adherence and there's section that don't. The right side of the bed sticks great and provides a good solid sheet. The center of the bed gets looser and doesn't stick together as well.
the Cali cat printed fine, but you can see that the first layer isn't perfect. The rest of the kitty was solid and printed with no other issues.Suggestions how I can get a more consistent printing? I'm nervous to try and print something bigger for fear that some sections will be much better than others.
Thank you!
--------------------
Chuck H
3D Printer Review Blog
I was afraid of that.
Do you know if chat has specific hours of operation or are they 24/7?
Chat
Not sure they follow the sun, but I would guess at 8 am US east time they should be there
even an old man can learn new things 🙂
Standard I3 mk3s, MMU2S, Prusa Enclosure, Fusion 360, PrusaSlicer, Windows 10
PRUSA MINI+ Prusalink + Prusa Connect
finally "fixed"
so after taking the mods advice, and chatting with tech support I got my min+ back up and running. I've printed off the usual first test prints and finally finished the "test" phase with a benchy. It looks pretty good, but, as you can see, the first layer's aren't as solid and pretty as I would like them. The same happened with the frog and the sheep. Once the printer gets passed the first few layers, it prints pretty smooth and clean. Any suggestions for tightening up this first layer?
Now you deal with first layr calibration issue.
Congratulation to you success. Now you are dealing with first layer calibration issue, where you have to focus on.
On help pages you will find the process description. Pleas follow the instructions - with Prusament PETg is sometimes an issue as the first layer tempearture is usually set to 240°C, but the first layer calibration sets only 230°C. But anyway, you can start print anything - eg. you model, and adjust the firsta layer look , and eventualy stop the print.
Then make a picture of it and post it here.
Do not forget to share the printing informations like temperature, live Z values you set for the first layer, etc.
even an old man can learn new things 🙂
Standard I3 mk3s, MMU2S, Prusa Enclosure, Fusion 360, PrusaSlicer, Windows 10
PRUSA MINI+ Prusalink + Prusa Connect
Final tuning fear
Yeah, to be honest, I'm almost a little scared to mess with it now that it's working.
I ordered some new filament (prusament this time) since I'm noticing that the stuff I'm using now is very stringy and not really sticking well to the plate. I figure I should at least make sure that my filament is good before I start fine tuning anything.
Do you have any links to the specific articles that help with first layer tuning on the mini+?
Thanks in advance for your help!
RE: X-axis fails self-test
I know this is an old post, but I started having this same issue. On the x axis test the print head moves all the way to the end then fails. I have tested movement by using the x axis move feature in the menu and what I noticed is each time I move from 180 (left) to furthest point right (-2) the x axis seems to be randomly losing count meaning when I return to 180 it hits the stop before 180 or 180 is sometime short of stop. If that makes sense. Here is the output from usb for the x axis test.
SELFTEST STARTprinter serial: CZPX1521X017XC41730
X-Axis Startedfwd X-Axis @50 mm/s1065 18040 01107 18040 01147 18040 01191 17983 3221231 17788 3801277 17559 3541323 17329 3801363 17130 3641403 16931 3701445 16721 3541492 16491 3681531 16292 3661571 16093 3581613 15884 3701659 15654 3701699 15455 3541739 15255 3521781 15046 3721827 14817 3721867 14617 3561907 14418 3521949 14208 3641995 13979 3522035 13780 3582075 13580 3682117 13371 3722163 13141 3522203 12942 3642243 12743 3702286 12528 3742332 12299 3682372 12099 3662412 11900 3782454 11691 3702500 11461 3702540 11262 3742580 11062 3782622 10853 3642668 10623 3642708 10424 3742748 10225 3802791 10010 3622838 9776 3782878 9577 3642918 9377 3702959 9173 3543005 8943 3723045 8744 3643085 8545 3703127 8335 3703173 8106 3703213 7906 3663253 7707 3603295 7498 3703341 7268 3703381 7069 3563421 6869 3603463 6660 3643509 6431 3603549 6231 3563589 6032 3543632 5817 3703678 5588 3603718 5389 3643758 5189 3703801 4975 3683847 4745 3683887 4546 3643927 4347 3763969 4137 3704015 3908 3684055 3708 3724095 3509 3784137 3300 3624183 3070 3764223 2871 3724263 2671 3664306 2457 3524352 2228 3784392 2028 3624432 1829 3684474 1619 3524520 1390 3664560 1191 3644600 991 3484642 782 3604688 552 3584728 353 3644768 153 3584810 -56 3604856 -285 3604896 -485 3544936 -684 3864974 -779 0 length = 188.190002 mmX-Axis FailedSELFTEST END
RE: X-axis fails self-test
sorry, I had that backwords. 180 (right) to furthest left (-2)
RE: X-axis fails self-test
looks like the test file didn't copy well. here is original file.
RE: X-axis fails self-test
Nevermind, I solved the problem. The set screw came loose on the x axis belt sprocket. I snugged it down and all is good.


