Bed Adherence - Problem Solving Sequence
Hi, appreciate +++ the community here and forum discussion. I'm new to 3D printing but understand the principles of bed adherence quite well. Here are the facts:
1. New MK4 printer (1 month old). Printing on Satin Sheet. Cleaned with 99% IPA.
2. Prusa Alpaca test piece printed flawlessly.
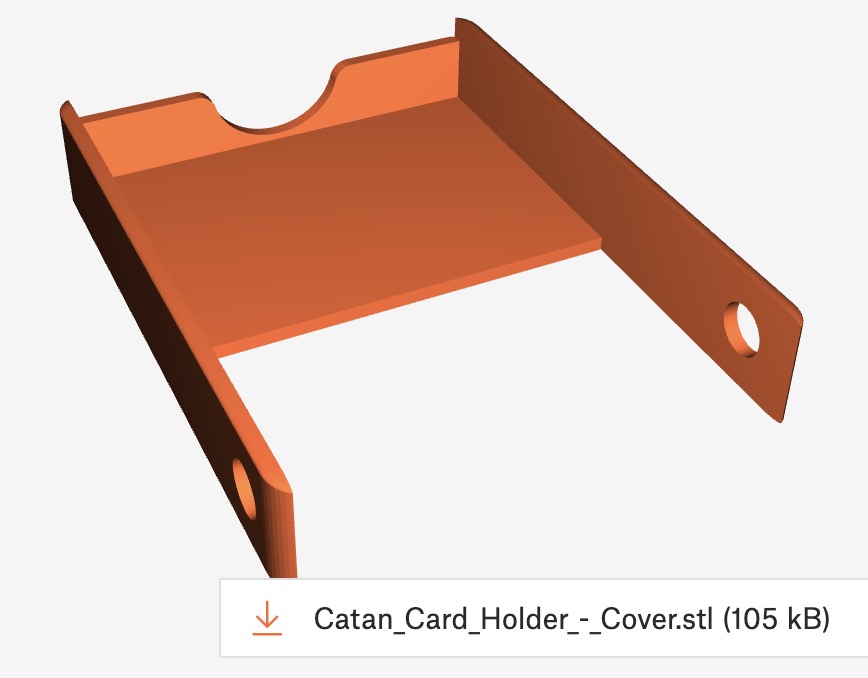
3. Downloaded STL file from Printables.com (cover for Catan card box). File was originally created for an Ender printer.
4. Sliced file with Prusa Slicer and G-Code indicates no errors.
5. Main body of print adheres well to Satin Sheet. BUT: Thin connecting arms are stringy, stranded, spaghetti. No adherence. See pics.
6. Options include: Change nozzle height, increase heat bed temp, increase nozzle temp, reduce fan speed, reduce nozzle speed.
QUESTION: If Prusa Slicer indicates no errors, are there any methods of identifying the best problem solving sequence? (i.e. first order changes for higher probability fixes)
Thank you!


RE: Bed Adherence - Problem Solving Sequence
What material are you printing with?
RE: Bed Adherence - Problem Solving Sequence
Thanks for responding. PLA, Prusament, which was sent with the printer.
I'm wondering if the simplest solution might be to engage brimming on any pieces that are narrow and have minimal footing area. From everything I've read, I don't think the heat bed, nozzle heat, speed, fan speed, Z axis, material, or cleaning will have as much impact as the area.
I completed a calibration that was flawless (required no adjustments) since writing my first post (see link below), which suggests that the printer calibration is working as expected.
Thoughts?
( https://www.printables.com/model/251587-stress-free-first-layer-calibration-in-less-than-5)
RE: Bed Adherence - Problem Solving Sequence
If you upload your model I will try it on my MK4.
Yes, brim would be the easiest fix, or mouse ears would also work in this sort of case.
Cheerio,
RE: Bed Adherence - Problem Solving Sequence
Wow, that's super nice of you Fabnav. 😉 I'll be curious to hear your observations.
Here's the link on Printables. I assume you would want to slice it yourself.
https://www.printables.com/model/776679-catan-card-holder/files
Cheers...
RE: Bed Adherence - Problem Solving Sequence
Thanks Diem, good idea. Mouse ears is a sensible plan too. If you know of any tutorials or instructions for making mouse ears, I'm all ears. 😉
They're in your Shapes gallery - for some reason Prusa calls them helper-discs - possibly to avoid attention from Disney lawyers.
Cheerio,
RE: Bed Adherence - Problem Solving Sequence
Ha! Nice quip. Haven't heard of helper discs... thanks for clarifying. Appreciated +++.
RE: Bed Adherence - Problem Solving Sequence
I printed the model on my MK4 using the satin sheet.
First I tried Prusament PETG with Input Shaper 0.4 nozzle and 0.20mm SPEED profile. The print came out decent, but not great. First two pictures.
Then I tried some generic PLA with Input Shaper 0.4 nozzle and 0.20mm SPEED profile. I stopped the print when I saw issues with the connecting arms. Third picture.
Finally I printed with the PLA again, with the same settings, but added a 2mm brim. It looks pretty good, but a little work is required to remove the brim. Last picture.


RE: Bed Adherence - Problem Solving Sequence
I like your sequencing, Fabnav. Looks like the issue is mostly related to the bed adherence and arm width. I'll try the brimming with this model, and will start there in the future as well before modifying other variables. Seems like the easiest thing.
Thanks so much for sacrificing your time and material for this. Let me know if I can repay the favour sometime.
Cheers!
RE:
If you don't need brim all the way round, you could add a box with height 0.2mm and width something like 5mm joining the ends of the arms. It might work and would be less to clean up. It's an alternative to mouse ears.