Surface Primer for getting rid of ASA Layer Lines?
Greetings!
I'm currently in the finishing stages of an 1:16 Scale RC Tank Project that I've been working on and off for like 2 years or so and while still figuring out how to create my own axles despite not owning a Lathe I'm currently chugging along on improving the surface finish of the model before painting it.
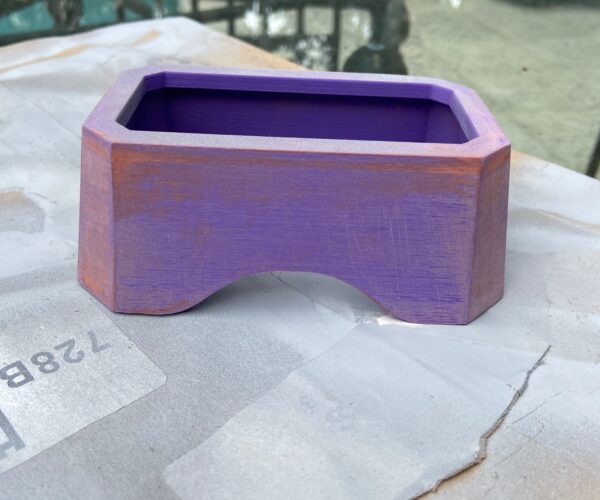
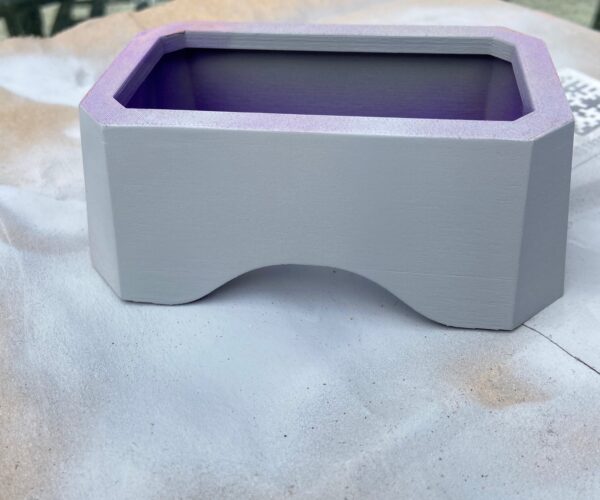
All parts were 3D Printed with the major visible sides printed onto a structured Springsteel Bed akin to that of my i3 MK3S in hopes of it not showing the Layer Lines while still providing a texture that can be sanded down for a rolled steel effect ( mostly flat with a few hicks here and there ) whiiiiich didn't quite work as expected... Even with Sanding > Spray Painting > Sanding > Spray Painting the Layer lines still show - Obviously I'm using the wrong Surface Primer ( Mr. Hobby Mr. Oxide Red Surfacer ) as it appears to have no gap filling capability whatsoever...
On this test piece of the Glacis Plate one half was coated in a ready to be used slurry of Modelling Putty ( super agonizing to apply - totally not gonna do that for the entire model ) while the other was left blank with both then Primed & Sanded at least twice:
Which brings me to my question: Any recommendation for an EU available ASA Plastic compatible Surface Primer that can deal with such the Print Bed Layer Lines? 🤔
( I don't mind the sanding that much, I just prefer the application to be done in a sensible timeframe... )
Cheers!
RE: Surface Primer for getting rid of ASA Layer Lines?
I start 120 or 150 grit sandpaper then rustoleum filler primer. Then ill use 220 or 400 grit and another coat or 2 of primer if needed. If there are any large defects on the print I use bondo glazing putty or tamiya basic type putty. I also use super glue + baking soda to fill gaps. I havent tried it myself but ive heard of people using UV printer resin to cover layer lines, or mixing bondo glazing putty + acetone and airbrushing it. If you dont mind a rough texture orange peel can also hide the layer lines.
RE: Surface Primer for getting rid of ASA Layer Lines?
I start 120 or 150 grit sandpaper then rustoleum filler primer. Then ill use 220 or 400 grit and another coat or 2 of primer if needed. If there are any large defects on the print I use bondo glazing putty or tamiya basic type putty.
That's pretty much it for me too although I go down to 600 grit and usually a coat of filler primer between the the first few grits as well. You can get really great results with not much work but you will need some patience,
RE: Surface Primer for getting rid of ASA Layer Lines?
Where do you get your Rust-Oleum from in the EU? Amazon doesn't seem to carry that brand and the only Stores I found selling the brand sell weird "Little Stars" stuff that seems to cater towards painting your Kids Room/Furniture 🤨 Stuff like Rust-Oleum Filler Primer or Sandable Primer is nowhere to be found 😑
RE:
Well in the US Rustoleum is just the brand that gets sold in all the big box home improvement stores like Lowes and Home Depot. I'm sure any similar high build filler primer will work. Just use the cheaper kind in the big cans and save your more expensive Mr Hobby primer for other projects. Im in the US so not sure where to buy them in europe but check your hardware or automotive stores.
One more thing is if you don't mind the extra time spent printing sanding .1 mm layers is much easier than .2 or higher. So if parts have lots of tiny details or hard to sand areas I might print at .1 mm.
RE: Surface Primer for getting rid of ASA Layer Lines?
Sanded with 120 grit then added bondo glazing putty to clean up a layer shift at the top, then sanded bondo with 220.
First layer of filler primer.
Bondo works great to get rid of the stepping on the arch on this part.
I have noticed that the textured build plate is harder to sand down than the sides. So it could be less effort to reprint some of your parts.
RE: Surface Primer for getting rid of ASA Layer Lines?
Yea... As I wasn't able to get hold of the recommended Primers and the ones in my local DIY Store proved unsatisfactory, forced me to go with the Scale Modellers method but using the more familiar Tamiya Basic Putty:
The left ( failed ) side was a still fairly viscose Slurry created from Tamiya Basic Putty and AK High Compatibility Thinner brushed and stippled onto an already sanded test surface whereas the right ( satisfactory ) side was just raw Tamiya Basic Putty stippled onto it - Either of which were a lot easier to apply onto than the incredibly runny Mr. Hobby Mr. Dissolved Putty I previously tried - Either the Combo or just the Tamiya Putty pretty much dry as you go so by the time you've reached the end of a section you can pretty much start sanding/polishing.
Still gonna take ages to do the entirety of the model - I guess I file it under the passion of having created a model all from scratch 😑


