RE: Hardware to Inspect i3 MK3
Sounds good. Time to do the 1st layer calibration. (read about that on Prusa forum, lots of information there).
To be sure that your PLA is dry enough, put it in a plastic bag/container and add a bag with silica granules (just buy the cheapest bags you can get) Put one in the bag with the PLA and wait 24 hours or so.
Enjoy
We will do what we have always done. We will find hope in the impossible.
RE: Hardware to Inspect i3 MK3
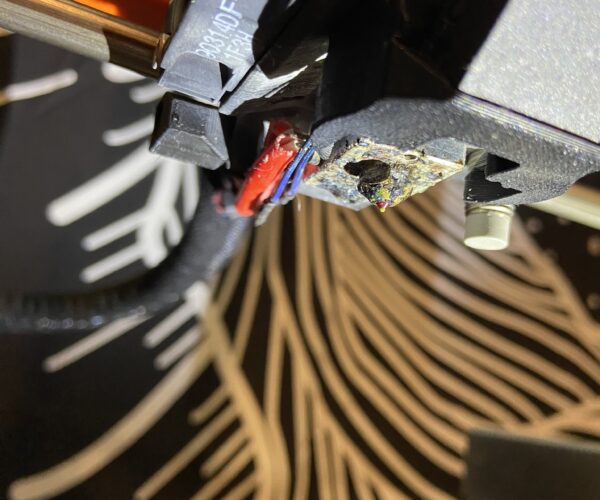
I forgot to post a pic of the nozzle after cleaning it for anyone to give me feedback on its condition. Here are a couple of pics of the nozzle.
I preheated the nozzle and cleaned it with a brass brush as carefully as I could and not touch the probe next to it. I tried my best not to brush anything but the nozzle.
Forgive me on the quality... was taking the pic with an iPhone and getting too close was not in focus.
RE: Hardware to Inspect i3 MK3
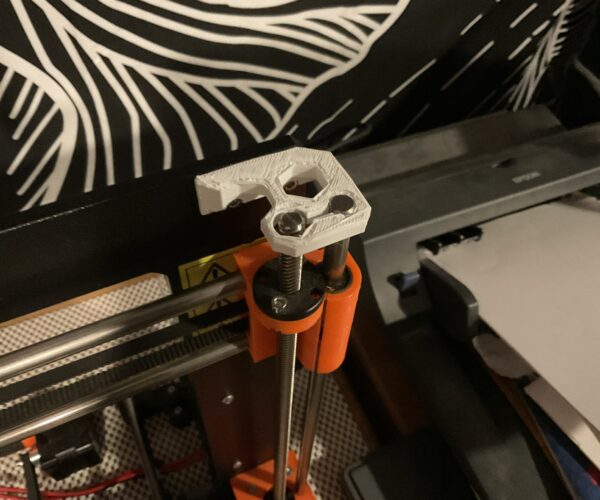
I printed the broken right upper Z bracket in hopes to keep it stable and working.
After some trial and error I learned that using some purple glue on the bed kept everything in place to print more succesfully.
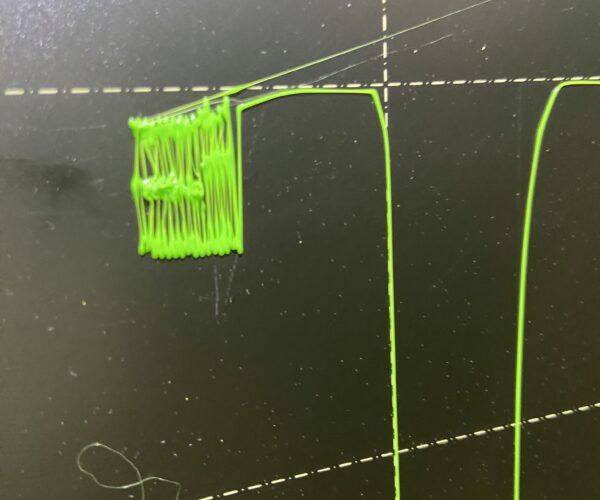
I noticed though that the very first layer or two comes out really rough, almost like guitar strings, instead of being close together and flat. I figured that might be part of the Z calibration.
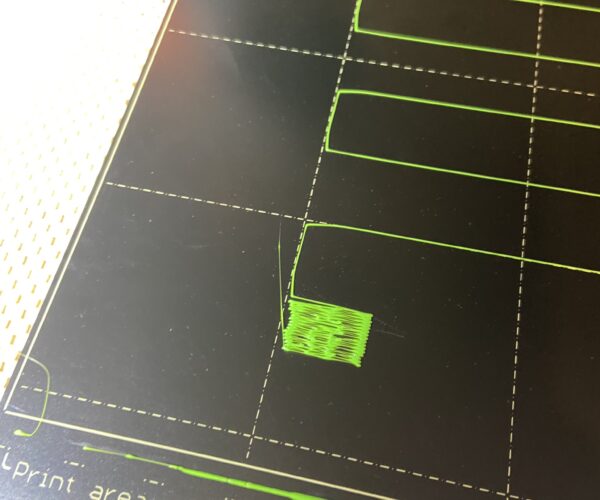
When I tried to recalibrat the printer after creating the Z bracket and installing it I couldn't get the Z calibration correct or correct from what I've seen online. The inicial print line comes down nice and flat and wide, but when it does the zig zag patter it's not quite right at the top end of the print when it make the wide corners, and when it does the square patter at the end it isn't a flat square. I tried adjusting the Z axis and nothing changes with settings anywhere from 0.00 to -0.280. It all comes out the same.
RE: Hardware to Inspect i3 MK3
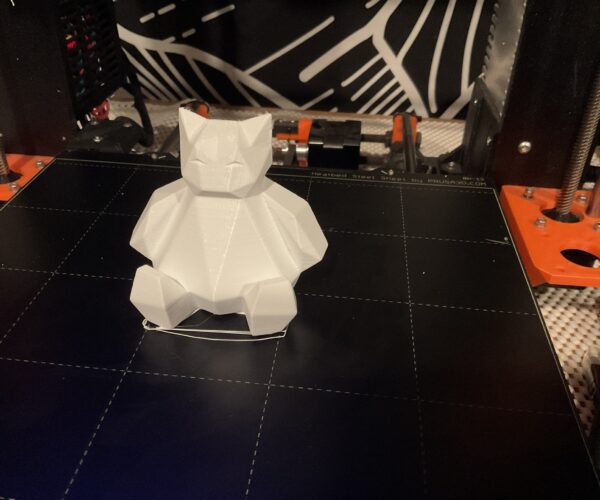
Even with the Z calibration issue, on a whim, I tried a simple print to see what would happen and it kind of turned out nice. You can see/feel the really fine layer lines but as it kept printing the last layer or finish was nice and not like the guitar sting like bottom.
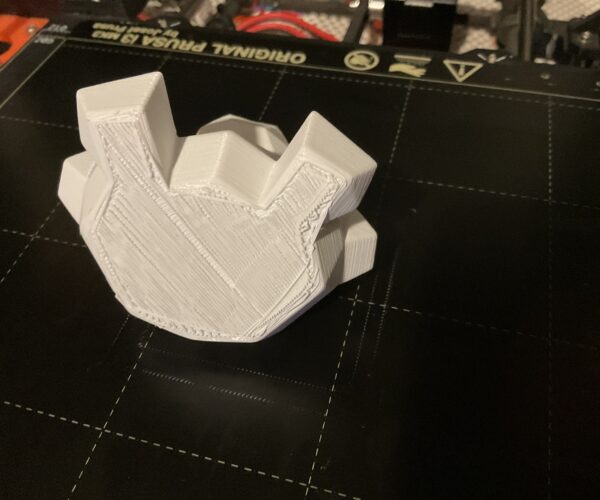
I tried a little bit of a bigger object and it too came out pretty nice except for the very bottom 2 or so layers...
RE: Hardware to Inspect i3 MK3
I sent Prusa an email address requesting assistance on getting the serial number from the system board but I've not received a reply yet.
I'd like to know what the base or original system was so I know when or where the upgrades started. I'm tempted to completely take this printer apart down to the kit level, inspect the parts and replace anything that needs to be replaced. I figure it might help me understand how this thing is put together and works. I'm still waiting on Prusa to response though.
I have a cousin that is relatively close by with a different brand 3d printer and is willing to lend it to me for me to print any replacement/kit upgrade parts. Hopefully I can get this upgraded completely (with all the parts that should be there) as possible.
RE: Hardware to Inspect i3 MK3
The nozzle is still too high, not only is the square not placed correctly, but also in the corners of the meander, the fiber does not hold and is pulled behind the nozzle. Do not be afraid to go even lower in fine-tuning the Z height, the corners where the meander changes direction must be nailed on the board and nicely perpendicular. Use white PLA for debugging, mistakes are easier to see. And the mat must be absolutely clean and degreased, without any glue. It is also a good idea to check the nozzle height in different places on the board. It is done similarly to the leveling of the mat for printers without MBL. Move the nozzle to the back left corner and measure its height by inserting paper or something into the gap between the nozzle and the pad. Then move the nozzle to the other corners and the height should be about the same. MBL is able to handle small deviations, unfortunately not large ones. And when I look at the photos in which condition you got the printer, I have great doubts about the verticality and correct assembly, because the damaged part at the end of the threaded rod indicates not very careful handling. The threaded rod MK2 construction suffered from very poor alignment of the base and frame, both in the X and Y directions. Download the MK2 assembly guide and visually go through all the assembly steps, especially the warnings for possible errors. Also, be careful when using other sheets (textured) Live Z will change, because the sheets are different thicknesses.
RE: Hardware to Inspect i3 MK3
I sent Prusa an email address requesting assistance on getting the serial number from the system board but I've not received a reply yet.
When I first started whith my printer (4 months ago) I used chat to connect with the helpdesk. Most of the time I had to wait about 20 minutes or so, but was helped very well after that. They keep track of the conversation, so you van pickup the chat-thread anytime later.
We will do what we have always done. We will find hope in the impossible.
RE: Hardware to Inspect i3 MK3
The nozzle is still too high
May I add: When you do not want (or are not yet able) to do a complete Z-calibration, you may go to settings in the menu.
There you find Z-axis adjustment. Change the height there and do the first calibration again.
Looking at the pictures, you have to go about 0,2 mm lower. (but check this in steps, you do not want the nozzle scratching the bed).
We will do what we have always done. We will find hope in the impossible.
RE: Hardware to Inspect i3 MK3
Get your self a bottle of alcohol/IPA
I forgot to post a pic of the nozzle after cleaning it for anyone to give me feedback on its condition.
Get your self a bottle of alcohol/IPA. Heat up the to about 80-90 Celsius, to clean it even better.
The printing might improve if you buy silicone socket(s) for the heatblock. That is not expensive, but helps a lot to keep the temperature stable (On the 12 Volt machine a cold draft, specially from the fan starting up at layer 4, might be enough to give a dip in the temp).
We will do what we have always done. We will find hope in the impossible.
RE:
I sent Prusa an email address requesting assistance on getting the serial number from the system board but I've not received a reply yet.
I'd like to know what the base or original system was so I know when or where the upgrades started. I'm tempted to completely take this printer apart down to the kit level, inspect the parts and replace anything that needs to be replaced. I figure it might help me understand how this thing is put together and works. I'm still waiting on Prusa to response though.
I have a cousin that is relatively close by with a different brand 3d printer and is willing to lend it to me for me to print any replacement/kit upgrade parts. Hopefully I can get this upgraded completely (with all the parts that should be there) as possible.
PS: Unless you have the printer NOT for printing, but for disassemble/assembling/fixing/repairing, do not NOT take it apart.
It will take you a lot of hours to get it back in the shape (or maybe) better then it is now. I have been tempted to do the same, but decided to only take it partly apart for "drilling down" to where the error(s) came from. So I forced myself to: think first, make a plan, and work by the plan.
This way I came to these discovery tracks:
1. "Check the axis
- Place it on flat table; All feet on the floor?; Measure (In my case all measurements where within 0,5mm or so. No adjustments to do; Use double wrenches + allen key to check all nuts and screws.
2 "Why are some layers moved sidewards?
- loosen the belts (X and Y) (see guides on Prusa howto). Feel if the bed moves all directions easily. And check if there are hard points to pass; Is there play along the axis? Or other irregularities? (In my case NONE after x years been used). Clean axis and put lubrication on (read about that in the forum).
- tighten the belts and check if they are the correct tension (can be done with a tool or tuner (phone app)). You want to hear a nice tone between 100-200Hz.
Better a bit too tighten then too loose.
- "Why does the printer stop with a big blob after 2-3 hours. And almost unable to get the flow back (restarting the print 🙁 "
Get/print parts you need first!!! Disassemble the extruder (see guides) all the way to the smallest detail. The PTFE was damaged (looked like a bad repair of previous owner). And a little part to fix the tube was missing. So rebuild it (learned a lot about how the extruder works and eve more about printing 🙂 And works now fine for about 100 hours or so.
-"Why are those cables hanging on the bed and on my printobject"
The cable holder was broken out of the backplate of the extruder-cartridge. So I searched untill I found the correct STl to reprint the backplate. Used Prusaslicer to cut a hole (so I could get the cables in without disconnecting the wires!). Printed the plate. Keeping my fingers crossed. Replaced the plate (and pfff ) everything fitted nicely.
Also printed some extra stuff to support the bed-cable. Looks like it run go for a couple of years like this.
We will do what we have always done. We will find hope in the impossible.
