RE:
3d printing and model railroading go hand in hand. Model railroading is what got me into 3d printing after seeing a working 3d printer years ago at a train show.
I joined our local makerspace, took a few courses there, and used the machines there until some repair issues caused a perpetual backup in booking time on the machines and an estimated three week delay for prints just dropped at the desk for the staff to run as time permits.
I then bit the bullet and got the Prusa printer, fortunately just before the Covid hit the fan.
I started the model railroad in 2016, shortly after we moved in to the new house. It's nowhere near complete, but taking shape more and more.
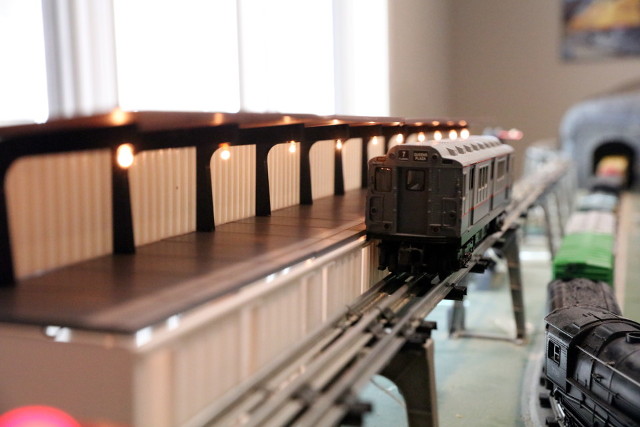
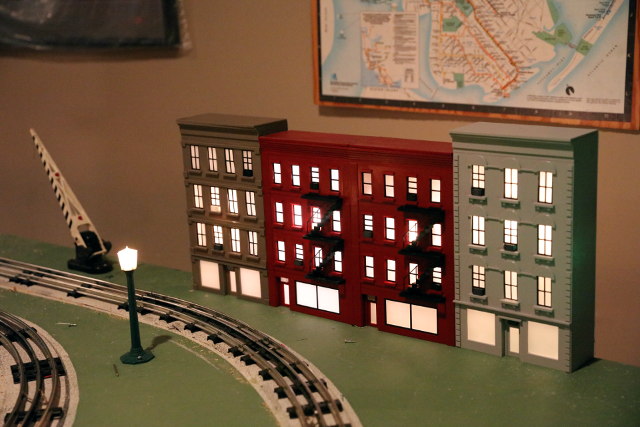
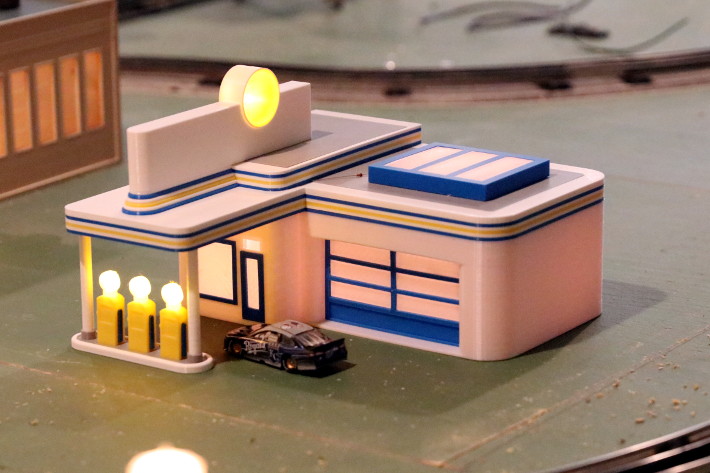
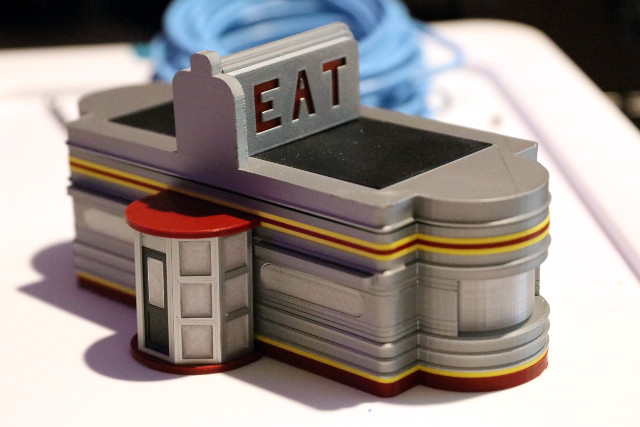
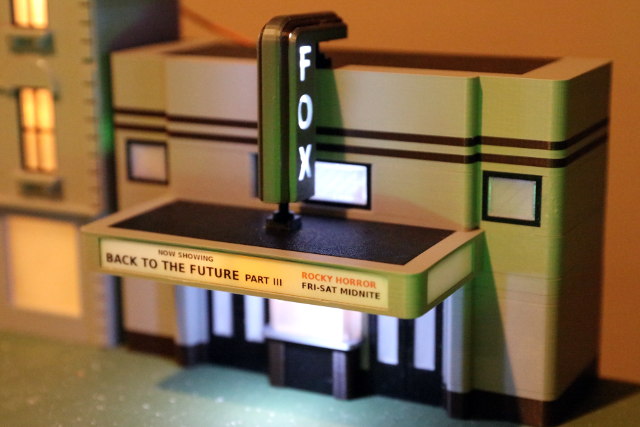
I've done mostly buildings and 'flats', which are difficult to find commercially, and even some accessories and a few cars. Here are a few shots. I've posted more in various threads here.
Yes, most of the buildings and flats are assembled in pieces, similar to model kits. The boxcar immediately below is a prototype of my '64 series' clone. I selected the Prusa I3 series specifically to be large enough to be able to print the 64 boxcar pieces.
(Anyone care to guess what building the one in the bottom photo was modeled after?) 😉


RE: Designing and Printing Interlocking Parts - First time - advice, please?
@jsw but how beautiful are the things you printed!! I congratulate you, I was also a lover of electric trains but for lack of space I had to give everything to another collector before I discovered the world of 3d printing.
RE: Designing and Printing Interlocking Parts - First time - advice, please?
Thanks, and sorry for hijacking this thread, but model railroad items are very good examples of 3d prints with close-fitting parts.
When we built our retirement house, we built a room in the basement specifically so I could have a dedicated train room. Still, there ended up not being that much walk-around room.
@jsw but how beautiful are the things you printed!! I congratulate you, I was also a lover of electric trains but for lack of space I had to give everything to another collector before I discovered the world of 3d printing.
RE: Designing and Printing Interlocking Parts - First time - advice, please?
Do you think the beveled connector, with sharper corners, would have more problems than if I stuck with 90° corners? Or if I used rounded connectors like @John Doe does?
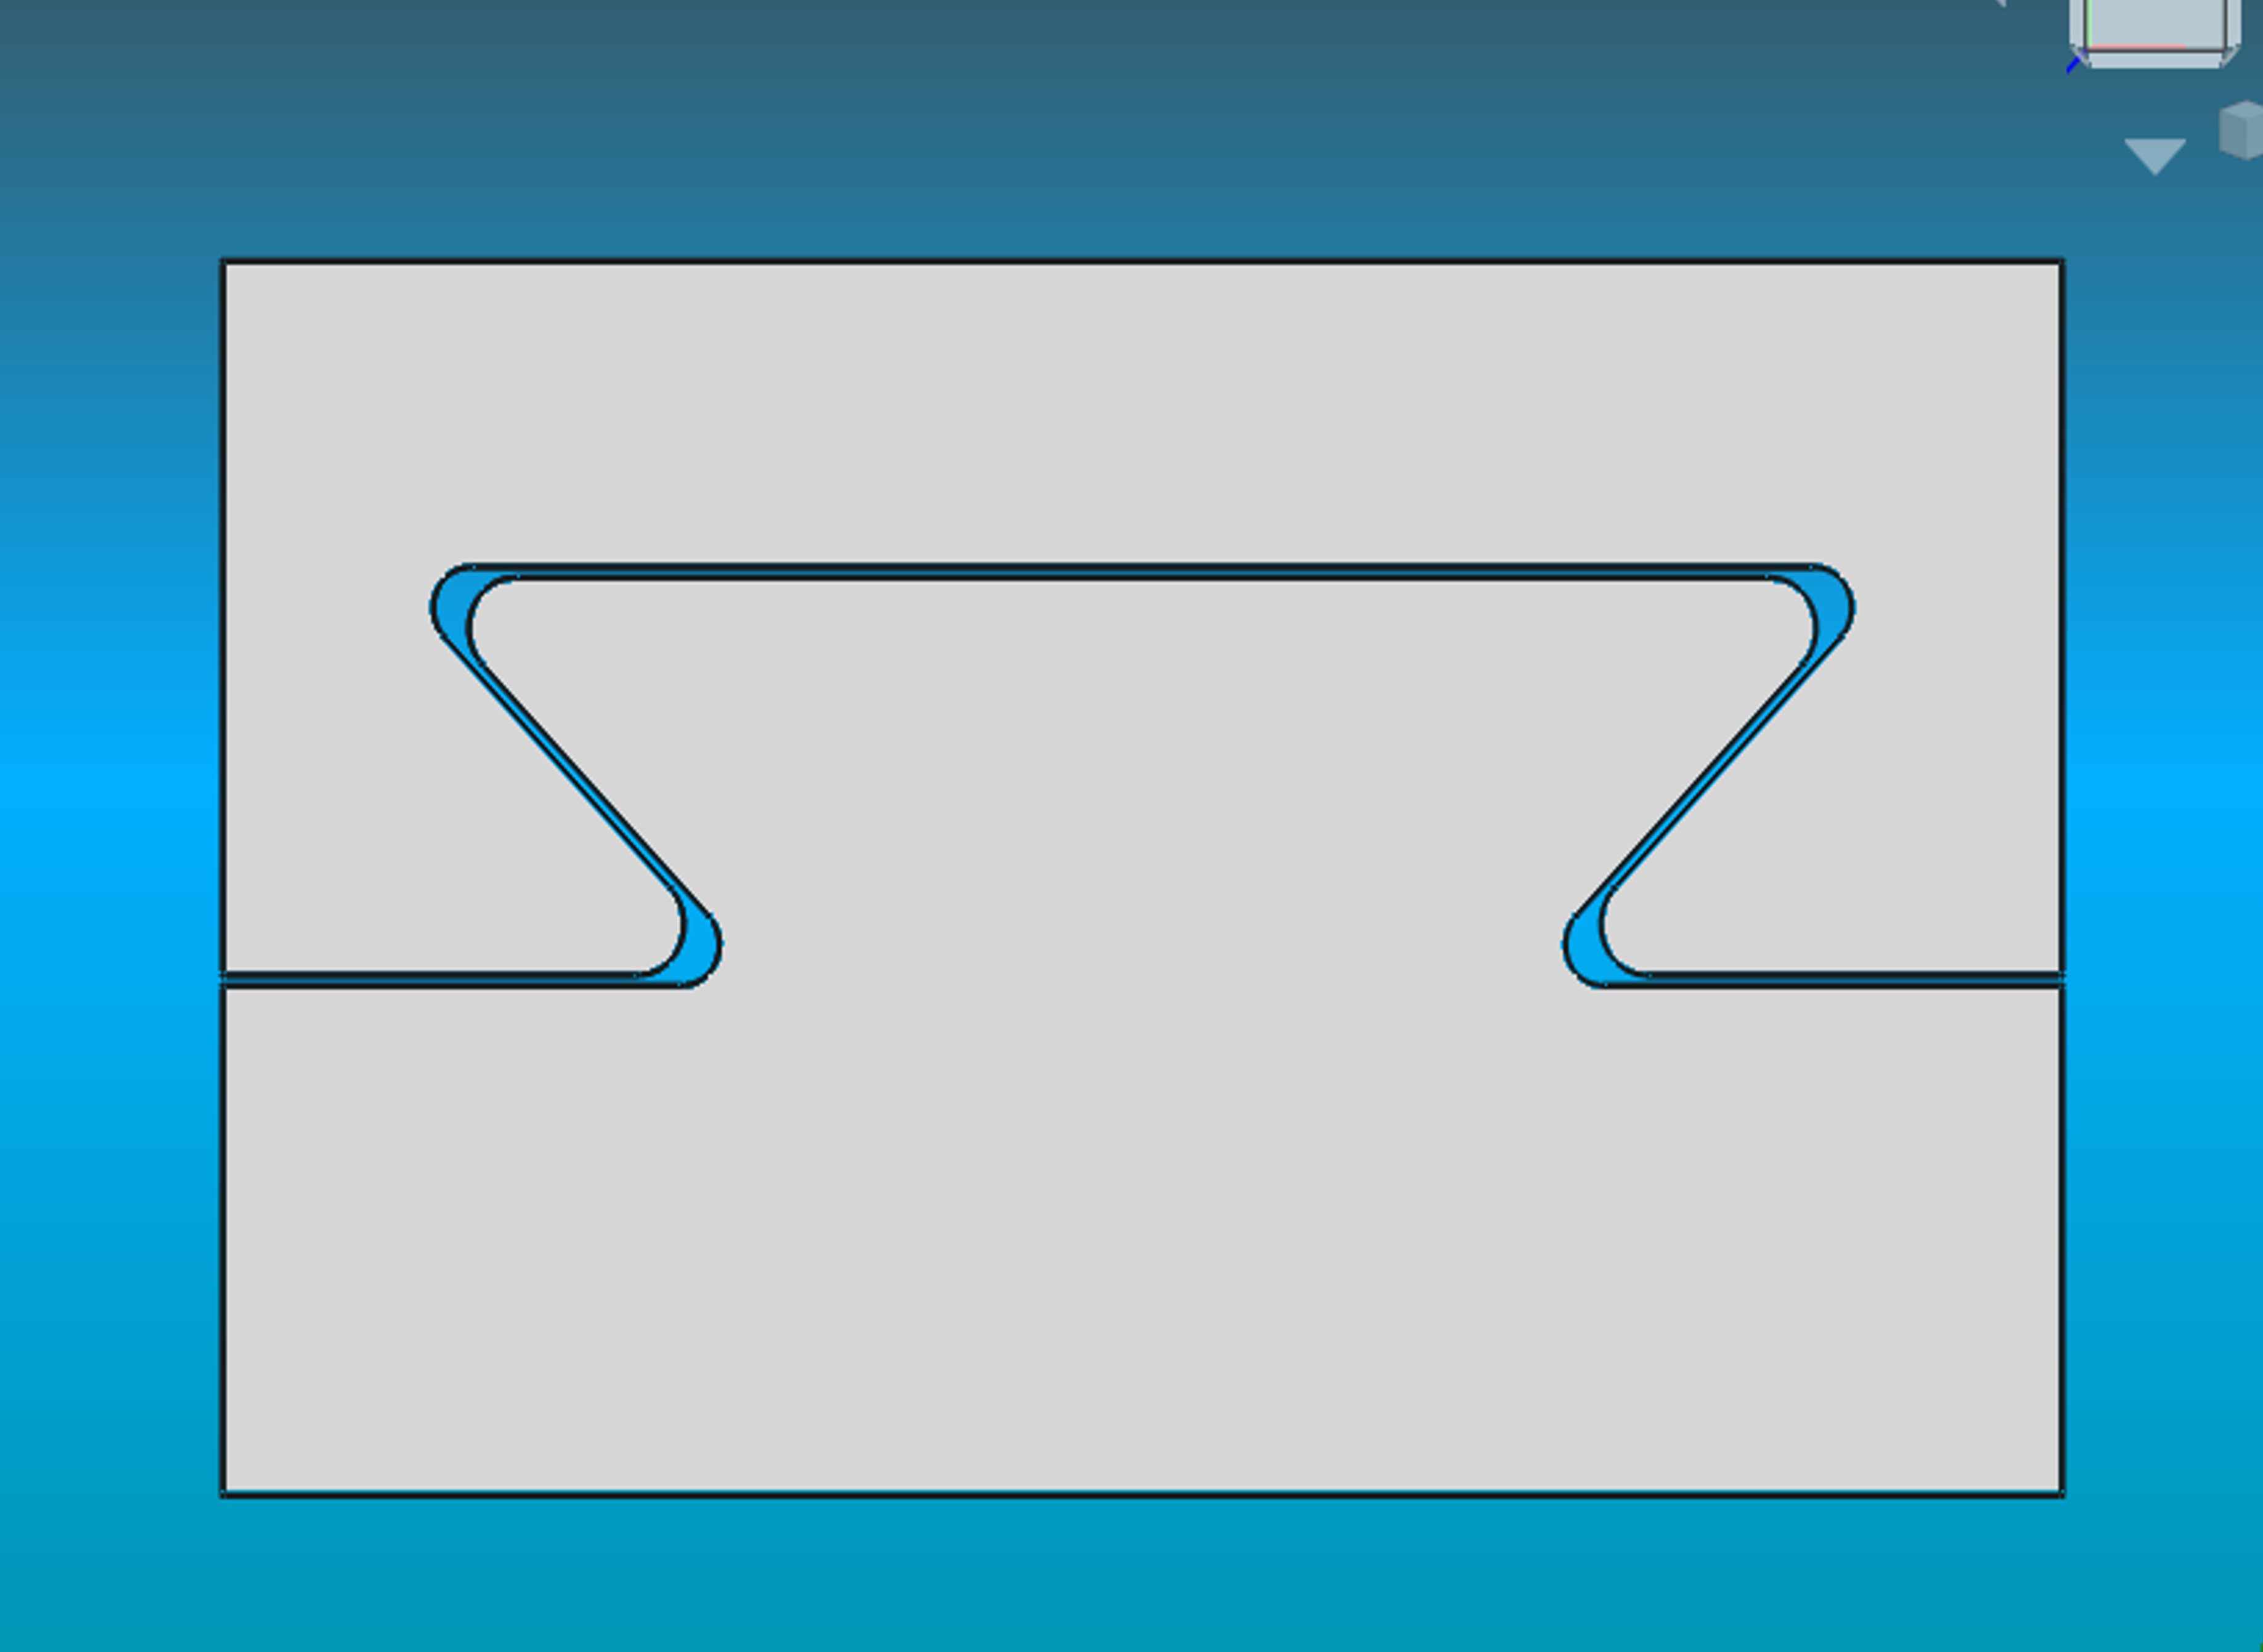
I whipped up a quick example since it's quicker than explaining it. A bevel like this would be better than using a 90 degree T slot (I assume that's what you mean by 90 degrees) since there are fewer corners and area to print and it's a bit simpler. Notice the fillets at the sharp corners, and the extra clearance gap between the corners (by selecting different sized fillets). The extra gap doesn't affect the functionality since you sill have the majority of the referencing contact surfaces.
You could do the round connectors, but they are taller. If you want a joint which is flatter then a dovetail can provide this.
Using layer height for a general measure - will that work as well for something in the XY plane where the clearance would not be determined by layers?
Yes, a global clearance equal approximately equal to the layer height (the above example has 0.1mm clearance). This is generally because thicker layer heights generally have lower dimensional tolerance (particularly at sharp corners since the bulges are larger). Although in theory if you calibrate the machine with for different layer heights, a part with 0.3 layers can still work with 0.1mm clearance. I have slightly different "XY size compensation" values for my 0.3 draft setting and 0.1 detail print setting, to compensate so they are both fairly accurate. Although to be fair 0.1mm tolerance is a tight tolerance in FDM printing terms, 0.2mm is a good middle ground and 0.3mm is pretty safe, although parts can end up being loose.
RE: Designing and Printing Interlocking Parts - First time - advice, please?
Sorry for a long delay in responding. As I mentioned in another post, I'm still dealing with the aftermath of Covid. It was a mild case, but it's left me exhausted for about a month now and that's made it hard to recover or to get anything done.
Thanks, and sorry for hijacking this thread, but model railroad items are very good examples of 3d prints with close-fitting parts.
Considering it was the OP (me) who asked you about trains, I think I need to take the blame for any hijacking - after all I did ask!
I whipped up a quick example since it's quicker than explaining it. A bevel like this would be better than using a 90 degree T slot
That is what I meant. I could see it in my head but did not know the name for it. Thanks for your comments on that and the rest of the information in your post. All quite helpful!