Advice wanted - Supports
I am printing a print for a paid customer. I looking for advice on how to maximize print quality. The overhangs are printing terrible. Rough underneath. I have tied PrusaSlicer 2.4-Alpha3. Does anyone have a suggested orientation to maximize quality on the overhangs?
--------------------
Chuck H
3D Printer Review Blog
RE: Did you forget something?
3mf file?
Mk3S+,SL1S
RE: Hmm
I could upload one but I am using standard settings with no changes. I really asking just about orientation and not about the settings.
I did forget the link to the file:
https://www.prusaprinters.org/prints/35510-unistrut-rail-button
--------------------
Chuck H
3D Printer Review Blog
Also, you mentioned supports in the title but then didn't mention them anymore. Are the rough overhangs caused by the supports or are you interested in suggestions for placing supports?
Formerly known on this forum as @fuchsr -- https://foxrun3d.com/
Rotation
Also, you mentioned supports in the title but then didn't mention them anymore. Are the rough overhangs caused by the supports or are you interested in suggestions for placing supports?
I forgot to inset the file. I was in rush to get to work. Sorry. I also was not as clear as I would liked.
I am really asking how you would rotate the device to print to prevent the terrible surface above the supports. I could rotate it 45 or 90 degrees.
--------------------
Chuck H
3D Printer Review Blog
Mental exercise in futility
I did some test prints last night and printed it with the button on it bottom. I am going to rotate it at 45 degrees and 90 degrees and see if I get less damage from the support. The supports at 0 degrees are between the two layers.
--------------------
Chuck H
3D Printer Review Blog
Yeah, I can see how the overhangs can be a problem. I've had a similar design in the past (very different use case though) and I ended up cutting it in the middle (parallel to the upper and lower surfaces) and gluing the two parts together. I guess I could have come up with some interlocking mechanism for the lower and upper part but it didn't seem worth the effort in that case.
Formerly known on this forum as @fuchsr -- https://foxrun3d.com/
My approach....
..... would be to cut it into three separate pieces, two flanges and a hub. Print the flanges inside surface down with a circular recess that is a slight interference fit for the hub. The recesses can have supports that may leave some cosmetic flaws inside the recesses, but the hub ends will hide all of that when glued together. You didn't say what filament, but if ABS, gluing with an acetone- containing glue should make a suitable bond.
Hear ye, Hear ye! Step right up folks and get your Government salvation here! Less than $.002 per word! Amazon.com/dp/B0B8XMMFP4
rotation
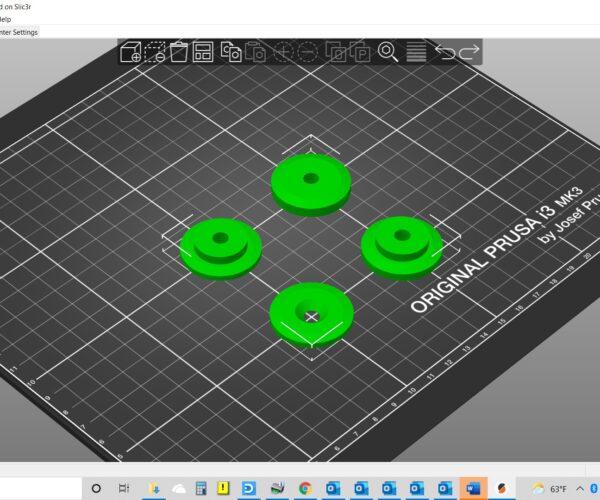
I'd print it like this.
Regards
Swiss_Cheese
I will try that next. I have tried 0, 45, and 90 degrees rotation. I am starting to think 45 degrees rotation on the y axis is the best position. I have a printer jam do deal with now. Might be a PTFE tube issue.
--------------------
Chuck H
3D Printer Review Blog
RE: Maybe this?
I had not noticed that the inside edges of the groove were also sloped, so a three-piece cut doesn't help. You can cut it four ways, but then assembly becomes a chore if you're making a bunch of them. If only a few, and the join lines are not objectionable, this may still be a viable option.
Hear ye, Hear ye! Step right up folks and get your Government salvation here! Less than $.002 per word! Amazon.com/dp/B0B8XMMFP4
Invert 1st and 3rd pieces for printing, then stack glue them left-to-right.
Hear ye, Hear ye! Step right up folks and get your Government salvation here! Less than $.002 per word! Amazon.com/dp/B0B8XMMFP4
RE: Seams.
I would prefer not gluing. That creates unsightly seams. I might try acetone smoothing and ABS.
Invert 1st and 3rd pieces for printing, then stack glue them left-to-right.
--------------------
Chuck H
3D Printer Review Blog
What's more unsightly, seams or the one-piece support/removal mess you had before? It's still perfectly functional.
Hear ye, Hear ye! Step right up folks and get your Government salvation here! Less than $.002 per word! Amazon.com/dp/B0B8XMMFP4
Sale
These items are for a product and may be sold. I cannot sell something that is unsightly. I will not make much but it is a gateway drug.
What's more unsightly, seams or the one-piece support/removal mess you had before? It's still perfectly functional.
--------------------
Chuck H
3D Printer Review Blog
RE: Advice wanted - Supports
What are the specifications for these rails? Sources/vendors/links? Surely these rollers are available for simple purchase. (of course, that takes all the fun out of it.)
Hear ye, Hear ye! Step right up folks and get your Government salvation here! Less than $.002 per word! Amazon.com/dp/B0B8XMMFP4
Multipart threaded design?
Could you design it as multiple parts that thread together? If there are variations of this part, that might even be more flexible.
and miscellaneous other tech projects
He is intelligent, but not experienced. His pattern indicates two dimensional thinking. -- Spock in Star Trek: The Wrath of Khan Unfortunately,…
RE: Advice wanted - Supports
Could you design it as multiple parts that thread together? If there are variations of this part, that might even be more flexible.
I considered that approach also, but it complicates the design and careful tweaking of the dimensions would be needed for fit (always an issue for threaded mating parts). Still, it would be stronger and you'd probably still want to assemble with glue; doesn't do anything for those unsightly seem lines though! 🙄 A simpler (maybe) approach would be (in my 4-piece version), put a few (4? 6?) blind holes in pieces 1 and 4, matching clearance holes in pieces 2 and 3, then assemble with rolled/tension pins and glue. Damn those ugly seams!
Hear ye, Hear ye! Step right up folks and get your Government salvation here! Less than $.002 per word! Amazon.com/dp/B0B8XMMFP4
Example threaded part
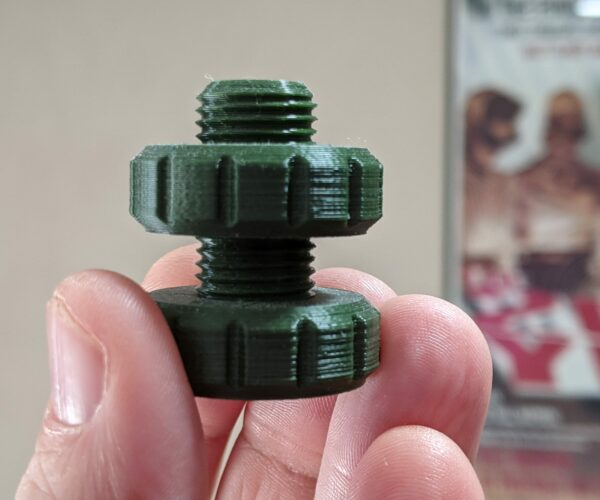
I put this design together (as a test last year) in a few minutes with Fusion 360. The threads fit well and are loose enough with the defaults that the nut part spins freely with a flick of the finger when printed with PLA. In PETG, it's a bit more snug but not bad. The overhangs were not a problem to print.
I'd expect to be able to print Chuck's part as a 2 piece print, with the top screwed onto the center shaft with a bit of threading up top. Overall finish was fine, although I did have grooves to hide the seam in. Seams were not a problem with the threading on either part.
and miscellaneous other tech projects
He is intelligent, but not experienced. His pattern indicates two dimensional thinking. -- Spock in Star Trek: The Wrath of Khan Unfortunately,…
Nice design!
Mind sharing the STL/3MF?
Hear ye, Hear ye! Step right up folks and get your Government salvation here! Less than $.002 per word! Amazon.com/dp/B0B8XMMFP4


