Benchy in TPU
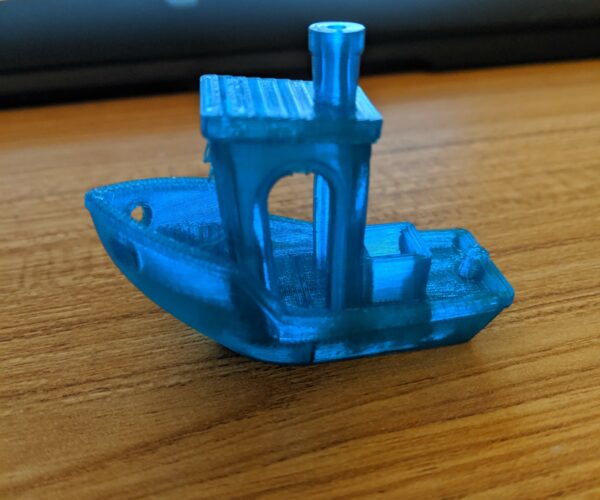
After much experimentation, I've found settings for TPU that yield pretty good results. This Benchy is pictured as-printed, with no cleanup. Notice that there are very few "threads" and that the overall shape is very close to design. There is only a little sag in the bridge across the front window. Sagging in bridges seems to be absolutely impossible to completely eliminate with TPU.
This print was made with a stock MK3S.
EDIT: Help: how do I insert pictures into the posting? The "Attach File" only allows me to attach one file, and even that file is not visible in the post without clicking on it.
RE: Benchy in TPU
Finally figured it out. Attach file is useless. The "Insert Image" icon is useless. Why are they there? "Add Media" works.


RE: Benchy in TPU
dragging and dropping files into the text input box, also works

 and if you select 'link to media' the image should open up larger when clicked!
regards Joan
I try to make safe suggestions,You should understand the context and ensure you are happy that they are safe before attempting to apply my suggestions, what you do, is YOUR responsibility.Location Halifax UK
RE: Benchy in TPU
Can you share the settings you used as well as the filament brand/type?
RE: Benchy in TPU
Thanks for asking.
The filament is MatterHackers Pro series TPU. As usual, I measured the diameter of the filament and used the actual in Slic3r PE (it was actually 1.75 - right on spec!).
Perhaps the most important trick is to use the Max Volumetric Speed (in the Filament Settings tab, "Advanced" screen). I have this set to 2mm^3/sec for TPU.
For this print, I had the print-cooling fan on "Auto" with minimum speed 35% and maximum 100%; I observed that it was at 100% while printing the smokestack. However, depending on the print, I sometimes run TPU with little or no fan. Long bridges crossways to the airflow get blown to the side with high fan, and if you're printing something with a "pancake" shape the restriction on where the air flows may cause the nozzle to be significantly cooler than the heat block, so fan settings are quite print-dependent.
Contrary to many people's recommendation, I do use retraction for travel moves. I have it set to 3mm. However, I have Lift Z set to zero, "Retract on layer change" deselected, and "Wipe while retracting" also deselected. I don't have an MMU.
I printed this Benchy with 0.25mm layer height, 4 perimeters, 4 horizontal shells, with "Ensure vertical shell thickness" and "Detect bridging perimeters" turned on.
Infill was standard 20%
Speed settings were 45mm/s for perimeters, infill, solid infill & top infill; 35mm/s for External Perimeters, and 25mm/s for Small perimeters. The outlier is Bridges, where I have it set to 60mm/s. Again, these settings seem to run against the typical recommendations to keep a consistent speed. But consider that the "Volumetric Rate" probably overrides and throttles down most of those speeds anyway.
Here's a big factor: my Extrusion Widths are all set to 0.42mm. I have found that this narrow trace greatly reduces the back pressure in the extruder, preventing the filament from buckling at the driving gears.
My Infill/perimeters overlap is 50%. With the flexible filament, this doesn't seem to cause artifacts on the outside surface, but it definitely helps "anchor" the first "normal" layer of infill to the perimeters after a bridge is laid down (because bridges with flexible filament ALWAYS sag and the next layer is always laid on top of a weak and barely existent base).
The Bridge Flow ratio is set to 0.4. This helps, but does not eliminate, the sagging of the first layer of a bridge. It also explains why I can increase the rate of motion of the printhead, because the rate of plastic extrusion per unit distance is decreased so much.
Besides all those settings, I also have heat sink fins on the side of my extruder motor, and I use a desk fan blowing across the motor to keep it just barely above ambient temperature (thus keeping the Bondtech gears cool).
Finally, I have an obsessive setup for keeping the TPU filament dry. https://www.thingiverse.com/thing:3026909
RE: Benchy in TPU
Wow cool Benchy.
I'm just in the process of dialing in my volcano. So thanks for the settings. Gonna use that as a starting point but MVS 2 is really low. I use MVS 20 on PETG now.
Could you share your exported slicer settings ?
Thank you a lot
RE: Benchy in TPU
Manuel-s, the setting of Maximum Volumetric Speed of 2 is specifically for TPU (flexible) filament. Of course you would use a much higher MVS (or ignore MVS) for ordinary filaments like PETG. There are thousands of pictures of Benchy prints, but not too many that I know of using TPU filament - which is why I added this picture to the crowd. The very best looking prints are made with PLA or PETG, but I was pretty pleased that I could get decent quality out of TPU.
So the slicer settings that I used for this Benchy are very very specific to TPU. TPU is hard to print because it is flexible and if you push it too fast through the extruder it will simply buckle and "escape" at the driving gears. Hence the very low MVS. I gave you all the critical settings in the above post. Personally, I believe that people should explore the settings and understand them, which is why I explain my settings in the text rather than just post a file with impersonal and un-explained numbers.
If you want a generic slicer profile for PETG, you can find one on the Prusa site, and you can also get Chris Warlicki's "Pretty" profile from Facebook. But be aware, any slicer profile you download off the Internet will not have the exact diameter of the filament on the spool you have, and depending on the manufacturer and brand it may not even be using temperatures that are optimum for your specific filament.
RE: Benchy in TPU
Wow that is a nice benchy. Are you using the updated "S" mods using the IR sensor? When I tried loading TPU it was a horrible clean up. Filament in the bondtech gears wrapped around itself. That was just load to nozzle.
RE: Benchy in TPU
Yes, I'm using the MK3S extruder. Although previously I was also able to get good prints with TPU using the original extruder, slightly modified by extending the PTFE tube up so that it was almost in contact with the Bondtech gears. Although the S mod has an IR on / off sensor for filament presence, I don't use it (I have it turned off). Since I'm not using an MMU, there's no particular benefit from having that sensor working, and always the potential for an unnecessary problem to ruin a print.
If your filament wouldn't even load into the nozzle, I would say first of all check to make sure the toothed groove in the Bondtech gear is perfectly aligned with the PTFE tube.
RE: Benchy in TPU
Interesting. I have a MMU2s. Much trouble getting the FINDA and IR sensor dialed in and understanding how each one affects the printer when erroneously triggered.
I will try again.
Thank you.
RE: Benchy in TPU
Thank you for your walk through on how you printed in TPU. I am about to start my TPU journey.
RE: Benchy in TPU
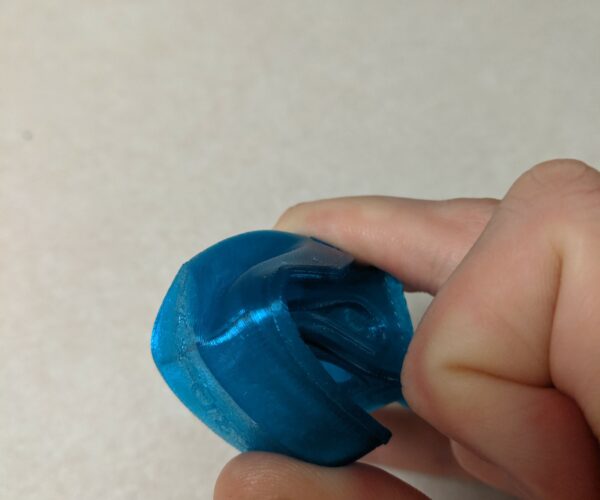
This is my 1% infill benchy in tpu I did some time last year. Just a bit of sagging over the window too.
RE: Benchy in TPU
Your walkthru - and reasoning - will help anyone printing in Flex. Good job.
RE: Benchy in TPU
Are we able to print with TPU and a MMU yet? Last time I tried (quite a long time ago) it was a mess to clean up.
I think to disable the MMU one has to take a bunch of things apart and unplug things then reconnect when done..
RE: Benchy in TPU
I think to disable the MMU one has to take a bunch of things apart and unplug things then reconnect when done..
Not really, you just need to remove the PTFE between selector and extruder, select "load to nozzle" and an empty slot, insert some filament into selector (to trigger FINDA and make the MMU believe it's loading something) and load filament manually directly into the extruder, done. You can print as if there where no MMU now. When finished, select "unload filament", remove the retracted filament from the extruder and thereafter the piece of filament from the selector, put the PTFE back in and everything should be good to go again.
If at first you don't succeed, skydiving is not for you.
Find out why this is pinned in the general section!
RE: Benchy in TPU
Thx so much for this @retireejay
With your settings I was able to drastically improve my benchy from TPU. Curious as to what your heat settings are. I am just getting slightly funky overhangs now, but it's so darn close!
RE: Benchy in TPU
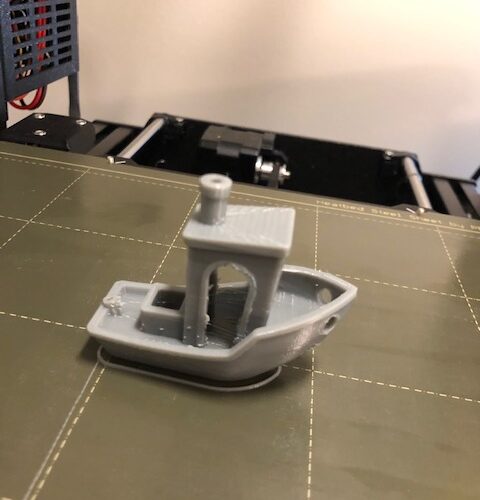
after a lot of messing around with re-tuning my ninja flex profile after upgrading to MK4, I got a reasonable benchy.
RE: Benchy in TPU
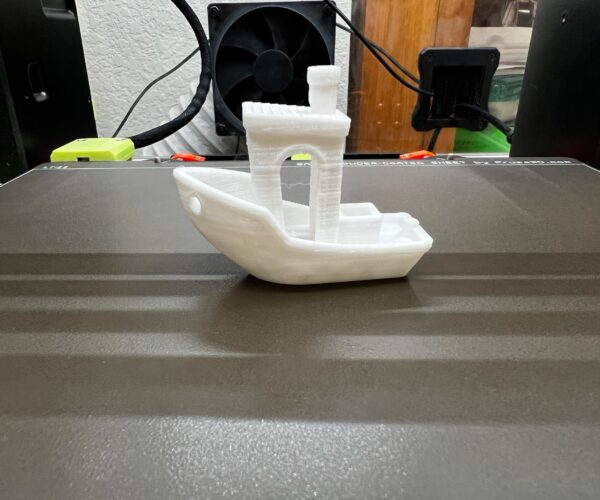
Nice @ssill2! In changing the printing orientation to have the bow of the benchy pointed to the front of the mk3s+, I was able to finally get a near flawless result. With the bow pointed eiter left or right, the overhangs on that bow were inconsistent.
Much better now. Also increased the infill to 25%

 just one little hiccup on the bow
RE: Benchy in TPU
yeah I've had less success with ninjaflex on the printer since I upgraded it to MK4. I actually like Sainsmart better, I get really good results even with the stock profile in the slicer. with the ninjaflex profile and ninjaflex filament I always have to print much hotter and now more extrusion multiplier to get anything half way decent. I don't know if this has to do with the planetary gear etc in the MK4. I did a bench in the sainsmart and other than slight droop in front window it looked perfect. it took a day or two of tweaking to not as good results with the ninjaflex. This is with spending overnight in the filament dryer too.
I'm not super concerned with a little droop on overhang since I would nearly never expect that to work haha. I mostly print keychains for my wife which don't have any overhangs whatsoever. I just want solid extrusion and minimal stringing. Yours looks great though. when I got everything dialed in on mk3, I had some flawless looking benchies in ninjaflex.
Maybe I'll mess with the ninjaflex again more this week. Not all tpus are created equal that's for sure.
Nice @ssill2! In changing the printing orientation to have the bow of the benchy pointed to the front of the mk3s+, I was able to finally get a near flawless result. With the bow pointed eiter left or right, the overhangs on that bow were inconsistent.
Much better now. Also increased the infill to 25%

just one little hiccup on the bow


