Brand new MINI+ Z height wackyness
I have a brand new MINI+and can not get the z-height adjusted correctly. While doing the calibration test I find that I can get the right side of the bed to stick (at a Z calib of -0.975) but the left side is about 5mm in the air!!! How do I fix this?
RE: Brand new MINI+ Z height wackyness
I’ve taken a closer look and it appears the the Z axis is not quite perpendicular to the xy plane. Is there an assembly issue than can cause this? Or is this a known issue?
RE: Brand new MINI+ Z height wackyness
Kinda sounds like the X/Z arm isn't mounted perpendicular to the bed.
RE: Brand new MINI+ Z height wackyness
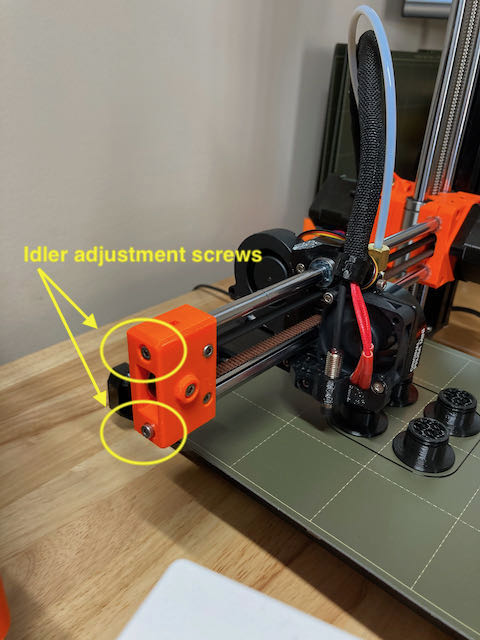
On the end of the X axis are the two idler screws. Get 2 of something, anything, as long as they are the same length and will sit under the rods. Put one on the right, and one on the left. Adjust idlers until level. I used two metal rods the same length. You can literally use anything.
RE: Brand new MINI+ Z height wackyness
@hagensieker
Thanks! I found the instructions for adjusting that at https://help.prusa3d.com/en/article/xz-axis-skew-correction-mini_158518
However, even after adjusting those screws as far as they would go, the left side is still 2-3 mm in the air when the right is at zero.
RE: Brand new MINI+ Z height wackyness
After chatting with the extremely helpful prusa support, this is a know issue with a simple fix for some people. You slightly loosen the two screws each on the front and back of the right base extrusion, rotate the whole z-axis until it is level and then tighten them down. They will be adding that to the manual soon.