bad prints
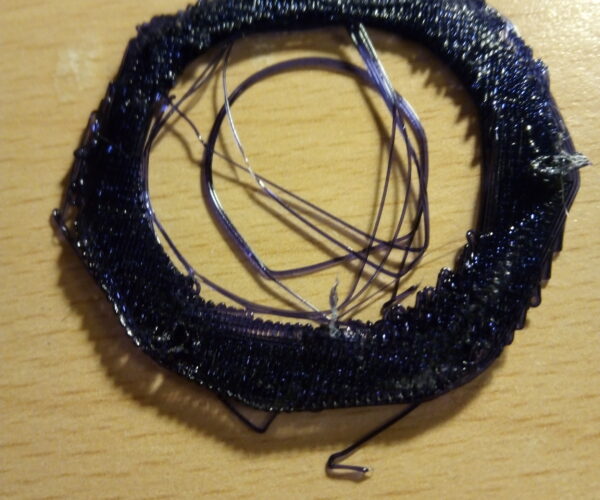
I don't understand what the problem I have with the print I put a picture of the print of Nut . After a few minutes of work the print comes off the table. The work is very bad. Even the first few steps seem wrong.
Thank you for your attention.
ps: It's pla filament
RE: bad prints
We can provide more solid suggestions if you upload your zip-compressed 3mf project file, which contains the model *AND* all your settings. If it comes off, it could be because the sheet is dirty and/or live Z is not set correctly. Or the stringing you see due to the overhangs of the nut threads may catch the nozzle and pull the model off. Some threaded models are not easy to print if the thread angle causes bad overhangs, you can try to print at lower layer height and increased fan speed.
Formerly known on this forum as @fuchsr -- https://foxrun3d.com/
Please turn the print over and show us the underside.
Cheerio,
RE: bad prints
Greetings to all, sorry for absence....
The print I was attempting is the standard prusa bundle print. I don't think it has any problems.
Instead I think there are problems with the z-axis adjustment or something with the platter.
I am sending you a photo of the initial test which as you can see is not perfect.
It seems strange to me that it is a cleaning problem, however novice I am.
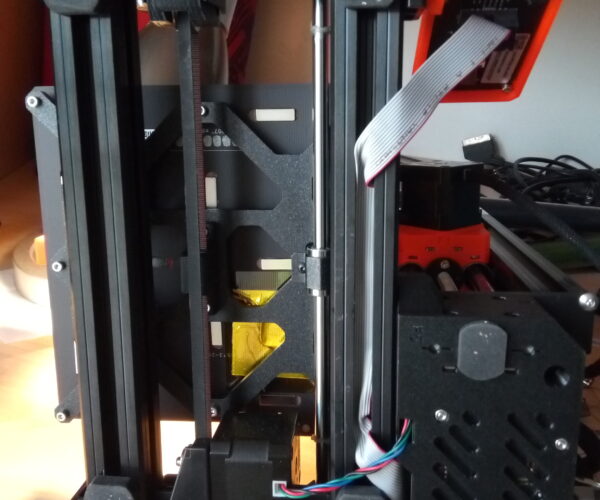
I don't understand which part of the machine Diem wants the photo of. The part below the platter or the whole machine?
It doesn't always happen that way, but with the various attempts I've made, the angles are always inaccurate
Here the photo of that i suppose needt to Diem
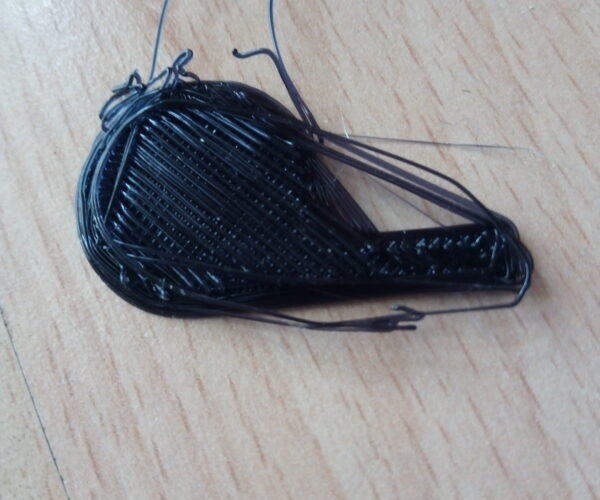
And here another attempt with the Prusa wistle. The first few layers look very poor to me and so the print comes off after a while.
Thank you for you time 👍
RE: bad prints
which part of the machine Diem wants the photo of
I meant the underside of the failed print - but no need now, you have given us enough to work with.
There are visible smears and fingerprints on your print sheet - for good adhesion it must be scrupulously clean.
Clean the sheet with dishwashing detergent (Dawn/Fairy) and plenty of HOT water, rinse well and dry with a fresh paper towel. Handle by the edges only.
The print coming loose is due to poor adhesion.
Your first layer 'Z' calibration is too high, not enough squish.
At the end of the calibration you are aiming to print a single layer postage stamp sized *sheet*. It should be possible to peel it off in one and fold it without the threads seperating. If it breaks into lines it is too high, not squished enough. If it is a single sheet but with wavy lines or drag marks on it you are too low.
Cheerio,
RE: bad prints
Your first layer is way too high, as Diem pointed out. You can use something like this https://www.prusaprinters.org/prints/105404 to optimize it. Easier to interpret than the built-in first layer calibration, and you can test up to 8 settings of live Z in one quick print.
Formerly known on this forum as @fuchsr -- https://foxrun3d.com/
RE: bad prints
I'll try it, Thanks
RE: bad prints
Thanks for the support.
I will be more careful about cleaning the plate, but I think there are other problems as well: surerly the height of the Z-axis. I will try using the software recommended by ....With the latest tests I got it closer and something better was seen. However, I think the first layers are very uneven as you can see in this photo.
They don't seem to be drawn as well as can be seen in the first layers of the whistle that just came off.
As an inexperienced person, they are also few in number for having to hold the piece all the way to the end. I thought of reducing the speed and actually at 70 % the whistle grew a lot, but it is not clear why, when he got to the top surface the print came off again.
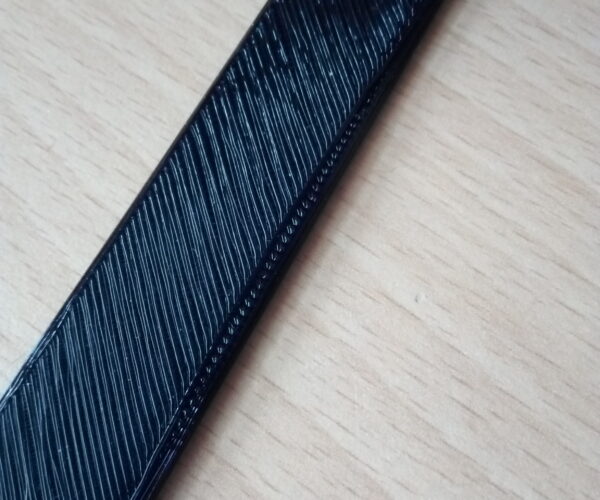
At 100 % speed I managed to print the prusa logo. I chose this because I thought a larger contact surface with the plate would hold the piece better. So it did, but it can't be the solution!!! 😂Here are photos of the piece that came out quite well.
You can see a filament on the back which is not parallel to the edge. I think it means that the filament does not stick in the right place when it is extruded. So I should really sort it out with a fine tuning of the z-axis 🤞
Thank you again
RE: bad prints
I am becoming an expert!!!😉
And I am a little disappointed at how long it took me to understand some things.
Perhaps the examples given by Prusa in the instruction booklet should also be more precise.
The problem is the Z-axis measurement.
I'm surprised that it has to be found before starting because I read that there is a probe (pinda) and I thought that was its job.
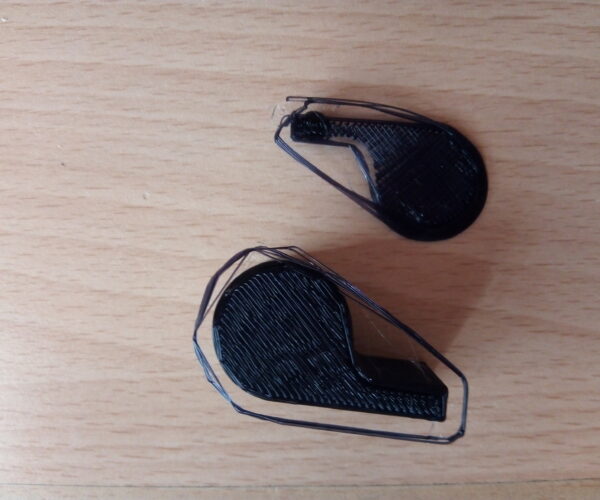
Anyway, now that I've fixed the height I understand what those strings were, that seemed to be wandering around in the first layers. They are the ones that make the skirt and they don't get in the right place if the extruder is too far away.
Especially if they have to draw circles, these threads do not stick well and they become "the bed" of the true first layer. So the entire print remains attached to the plate with them alone: not enought!
Now that I have the height adjusted properly, the skirt can be seen very well and no longer ends up below the first layer....
In the photos below you can see the two results very well. In the perfect whistle you can see the skirt very well while in the other one it ended up making the first layer...😳
At Prusa I would say that the defect can already be seen with the initial purging line . In the picture you can see three types of purging line.

I did not know that the first one on the left was wrong. You can already see an improvement with the middle one, and the line on the right is the perfect (...) one, as I understand now that the printer is working well.
This photo is much more useful than the one put in the instruction booklet showing the rectangle path that I also put in my post.
I did not use the Fuchsr's test, but I am curious to understand how it works and I will pay him a espresso coffee... (I am Italian) 😉
Thanks for your help and see you next time!
Your first layer 'Z' calibration is still too high, go lower until it squishes together.
I read that there is a probe (pinda) and I thought that was its job.
Yes, it is the position of the probe that the calibration measures.
Cheerio,
RE: bad prints
I read that there is a probe (pinda) and I thought that was its job.
What the PINDA probe does is to create a map of the print surface during mesh bed leveling so that the hotend will be moved slightly up and down as the first layer goes down to account for imperfections of the surface. However, you have to provide it with a "base line" distance from the bed, which is done through the first layer calibration aka Live Z adjustment. On the Mk4, the load cell actually touches the print bed directly during bed leveling so there's no need for Live Z calibration on the Mk4.
Formerly known on this forum as @fuchsr -- https://foxrun3d.com/
RE: bad prints
In truth, I am comfortable with this calibration. How can you tell it's still a bit high? Obviusly I have no problem lowering it further....
RE: bad prints
Yes, now I understand what its function is. Before, I thought it did even more than that....🤷♂️
Coffee is arriving !!!👋
